Hi girls!!
It's amazing how fast the time runs... It's another day of the SummerNails Challenge and the theme is Waves! Of course, I immediately thought of the sea and it's big foamy waves...
Hola Chicas!! Es increíble cómo corre el tiempo... Hoy es otro de los días del Reto SummerNails y el tema es Olas! Por supuesto yo pensé inmediatamente en el mar y sus grandes olas con espuma...
How amazing is this design?? And super-appropriate for summer!! I have to say (and you may all already know) this is not my design, it's Nailasaurus' I Wanna go Surfing design. She made an awesomely easy tutorial that I followed step by step, I even did the whole manicure with nail polish! No Acrlics.
A que es un diseño increíble?? Y super-apropiado para el verano!! Tengo que decir (aunque la mayoría puede que ya lo sepais) que este no es mi diseño, es el diseño de Nailasaurus I Wanna go Surfing. Ella tiene un tutorial increíblemente sencillo que he seguido paso por paso, incluso he hecho la manicura entera con esmaltes! Sin acrílicos.
I used Yes Love Y36 for the sky blue colour of the background and then mixed Kiko 336, Claire's Mood Colour Change Peaceful/Confident and Astor Color Pop 184 as the tutorial said, with brush strokes. Finally, with a make up sponge, I dabbed some white polish, Flormar 400, on the tips to recreate the foam. Seche Vite and it's done!
Utilicé Yes Love Y36 para el color azul cielo de fondo y luego mezclé Kiko 336, Claire's Mood Colour Change Peaceful/Confident y Astor Color Pop 184 como decía el tutorial, con pinceladas. Para terminar, con una esponja de maquillaje, di toquecitos en las puntas con esmalte blanco, Flormar 400, para recrear la espuma. Seche Vite y terminada!
I hope you liked it and don't forget to have a look around the other participants of the challenge!!!
See you soon!!
Espero que os haya gustado y no os olvidéis de echar un vistazo a las demás participantes de reto!!
Nos vemos!!

Mostrando entradas con la etiqueta Astor. Mostrar todas las entradas
07 agosto 2013
24 diciembre 2012
Reto Oh Oh Oh! #7 y Winter Holiday Challenge #7: Santa Claus!!
Hi Everyone!!
I'm steal dealing with this annoying cold and awful cough, that keeps me awake every night. I'm so tired that I don't know what I'm going to do tonight to keep me awake while I have our Christmas Eve's dinner with my family... Let me give you a piece of advice: stay away from cold feet and hands...
Santa is not coming to my house tonight because here in Spain the gifts are brought by the Three Magic Wizards, on the night of January 5th, but anyway I am going to wear these tonight, in case he wants to skip Spanish traditions...
Hola a Todos!!
Todavía estoy aquí aguantando este molesto resfriado y esta horrible tos que me mantiene despierta todas las noches. Estoy tan cansada que no se qué voy a hacer esta noche para mantenerme despierta durante la cena de Nochebuena con mi familia... Dejadme que os de un consejo: manteneos alejados de los pies y manos fríos...
Santa no va a venir esta noche a mi casa porque aquí en España los regalos los traen los Tres Reyes Magos, la noche del 5 de Enero, pero de todas fomas voy a llevarlas así pintadas, por si acaso Santa decide saltarse las tradiciones Españolas...
As the base I used Astor Pop Color 147, the perfect Christmas Red with golden shimmer! On my ring finger I drew Santa's Belt with Deliplus 47 and Yes Love Nail Art Silver Glitter. On the other nails I used my new Viva La Nails Christmas Stickers Sample Pack!!
Para la base utilicé Astor Pop Color 147, el Rojo con Shimmer Dorado perfecto para Navidades! En el dedo anular dibujé el cinturón de Santa con Deliplus 47 y Yes Love Nail Art Silver Glitter. En las otras uñas he utilizado mi nuevo Pack de Muestra de Pegatinas de Navidad de Viva La Nails!!
Half a hour after I applied the stickers they started peeling, but I totally blame Seche Vite for that. We all know that Seche Vite's ingredients behave oddly sometimes, and I think this time they melted the glue a little bit... I hope you liked it!!!
Media hora despues de poner las pegatinas, comenzaron a despegarse, pero le hecho la culpa totalmente al Seche Vite. Todos sabemos que los ingredientes del Seche Vite se comportan de forma rara a veces, y creo que esta vez derritieron el pegamento un poco... Espero que os haya gustado!!!
Etiquetas:
Astor,
Deliplus,
Glitter,
Manicuras,
OhOhOh Challenge,
Red,
Shimmer,
Stickers,
Viva La Nails,
Winter Holiday Challenge,
Yes Love
28 noviembre 2012
Glitter Sandwiches
Hi girls!
Today is the last day for the Esmaltofílicas Challenge, but first I wanted to show you the experiments I've been doing with my polishes.
When I started painting my nails my biggest fear was to buy a very sheer polish, because I HATE to use 4-5 coats plus the nail art, plus the drying time!! But now a new technique has been discovered to make your sheer polish useful, the Glitter Sandwich!
Hola Chicas!
Hoy es el último día del Reto Esmaltofílicas, pero antes os quería enseñar los últimos experimentos que he estado haciendo con mis esmaltes.
Cuando empecé a pintarme las uñas mi mayor miedo era comprar un esmalte trasparentoso, porque ODIO tener que dar 4-5 capas más el nail art, más el tiempo de secado!! Pero ahora se ha descuvierto una nueva técnica para hacer vuestros esmaltes trasparentosos útiles, el Glitter Sandwich!
These are all made by alternating coats of glitter and sheer polishes, you have a very good tutorial by Nail Art 101. The difficult thing is to find the right polishes to do it (as always) so I gathered together all my sheer polishes and two glitters that I thought would be good for this technique.
Sheer Polishes: Essence Punk Royal, Yes Love Pastel Yellow, Yes Love Pastel Green, Yes Love Pastel Blue, Yes Love Pastel Purple, Essence Shining Star, Essence Frozen Queen, Astor Pop Color 148, Claire's 137 Jade Green.
Glitter Polishes: Essence Glorious Aquarius, Essence Circus Confetti.
Todos están hechos alternando capas de esmaltes de glitter y transparentes, teneis un tutorial de Nail Art 101 muy bueno. La dificultad reside en encontrar los esmaltes adecuados (como siempre) así que reuní todos mis esmaltes transparentosos y dos glitters que pensé que funcionarían bien con esta técnica.
Esmaltes Transparentosos: Essence Punk Royal, Yes Love Pastel Yellow, Yes Love Pastel Green, Yes Love Pastel Blue, Yes Love Pastel Purple, Essence Shining Star, Essence Frozen Queen, Astor Pop Color 148, Claire's 137 Jade Green.
Esmaltes de Glitter: Essence Glorious Aquarius, Essence Circus Confetti.
My favourites were these three because the had a lot of depth and the colours of the glitter showed perfectly through the polishes. Which are your favourites?
Mis preferidos son estos tres, porque tenían mucha profundidad y el color del glitter se veian genial. Cuales son vuestros favoritos?
This is Deborah Lippmann Candy Shop, a very famous polish that I LOVE!! But it's too expensive for me, so I wanted to recreate it with the Glitter Sandwich technique, so I bought a pink sheer colour and layered it over Essence Circus Confetti.
Este es Candy Shop de Deborah Lippmann, un esmalte famosísimo que me ENCANTA!! Pero es demasiado caro para mi, así que he querido reproducirlo con la técnica del Glitter Sandwich, así que compré un esmalte transparentoso rosa y lo uní con Essence Circus Confetti.
Ok... if you see it right next to the original one it seems like a total fail! But I swear I really liked the result, and the glitter was more visible through the pink in real life... The big problem was the Deborah Lippmann Candy Shop is soooo heavily packed with glitter, and Circus Confetti is just a topper. But if I figure the way to get more glitter on my nails I would have a very decent recreation of this famous polish. What do you think?
Ok... Si lo veis junto a la foto del original parece un desastre total! Pero os juro que me gustó mucho el resultado y que el glitter se veía mucho más a traves del rosa en la vida real... El mayor problema es que el Candy Shop esta lleniiiiiiisimo de glitter, y el Circus Confetti es solo un topper. Pero si consigo averiguar la manera de dejar más glitter en las uñas tendré un intento muy decente de este esmalte tan famoso. Que pensais vosotros?
Today is the last day for the Esmaltofílicas Challenge, but first I wanted to show you the experiments I've been doing with my polishes.
When I started painting my nails my biggest fear was to buy a very sheer polish, because I HATE to use 4-5 coats plus the nail art, plus the drying time!! But now a new technique has been discovered to make your sheer polish useful, the Glitter Sandwich!
Hola Chicas!
Hoy es el último día del Reto Esmaltofílicas, pero antes os quería enseñar los últimos experimentos que he estado haciendo con mis esmaltes.
Cuando empecé a pintarme las uñas mi mayor miedo era comprar un esmalte trasparentoso, porque ODIO tener que dar 4-5 capas más el nail art, más el tiempo de secado!! Pero ahora se ha descuvierto una nueva técnica para hacer vuestros esmaltes trasparentosos útiles, el Glitter Sandwich!
These are all made by alternating coats of glitter and sheer polishes, you have a very good tutorial by Nail Art 101. The difficult thing is to find the right polishes to do it (as always) so I gathered together all my sheer polishes and two glitters that I thought would be good for this technique.
Sheer Polishes: Essence Punk Royal, Yes Love Pastel Yellow, Yes Love Pastel Green, Yes Love Pastel Blue, Yes Love Pastel Purple, Essence Shining Star, Essence Frozen Queen, Astor Pop Color 148, Claire's 137 Jade Green.
Glitter Polishes: Essence Glorious Aquarius, Essence Circus Confetti.
Todos están hechos alternando capas de esmaltes de glitter y transparentes, teneis un tutorial de Nail Art 101 muy bueno. La dificultad reside en encontrar los esmaltes adecuados (como siempre) así que reuní todos mis esmaltes transparentosos y dos glitters que pensé que funcionarían bien con esta técnica.
Esmaltes Transparentosos: Essence Punk Royal, Yes Love Pastel Yellow, Yes Love Pastel Green, Yes Love Pastel Blue, Yes Love Pastel Purple, Essence Shining Star, Essence Frozen Queen, Astor Pop Color 148, Claire's 137 Jade Green.
Esmaltes de Glitter: Essence Glorious Aquarius, Essence Circus Confetti.
My favourites were these three because the had a lot of depth and the colours of the glitter showed perfectly through the polishes. Which are your favourites?
Mis preferidos son estos tres, porque tenían mucha profundidad y el color del glitter se veian genial. Cuales son vuestros favoritos?
Picture by: ThePolishaholic
Este es Candy Shop de Deborah Lippmann, un esmalte famosísimo que me ENCANTA!! Pero es demasiado caro para mi, así que he querido reproducirlo con la técnica del Glitter Sandwich, así que compré un esmalte transparentoso rosa y lo uní con Essence Circus Confetti.
Ok... if you see it right next to the original one it seems like a total fail! But I swear I really liked the result, and the glitter was more visible through the pink in real life... The big problem was the Deborah Lippmann Candy Shop is soooo heavily packed with glitter, and Circus Confetti is just a topper. But if I figure the way to get more glitter on my nails I would have a very decent recreation of this famous polish. What do you think?
Ok... Si lo veis junto a la foto del original parece un desastre total! Pero os juro que me gustó mucho el resultado y que el glitter se veía mucho más a traves del rosa en la vida real... El mayor problema es que el Candy Shop esta lleniiiiiiisimo de glitter, y el Circus Confetti es solo un topper. Pero si consigo averiguar la manera de dejar más glitter en las uñas tendré un intento muy decente de este esmalte tan famoso. Que pensais vosotros?
31 julio 2012
Summer Challenge Day 43: Olimpic Medals
Hi girls!
I know I've skipped a lot of manicures of the summer challenge, but here in Spain we don't follow the Olimpic Games a lot and it doesn't inspire me... And I was busy doing the Disney Challenge too.
Well but for today I have a very simple manicure with a new technique.
It's not my best try, and I will do it again and keep practising. This is an interpretation of the Olimpic Medals and I wanted to keep it really simple, so I painted one nail Golden, another silver and the third one bronze, just as the medals, and framed them.
------------------------------------------------------------
Hola chicas!
Ya se que me he saltado muchas manicuras del Reto de Verano, pero aquí en España no seguimos demasiado los Juegos Olímpicos y no me inspiran mucho... Y también he estado ocupada con el Disney Challenge.
Bueno, para hoy os traigo na manicura muy simple con una tecnica nueva.
No es mi mejor intento, y lo tengo que intentar de nuevo y seguir practicando. Es una interpretacion de las Medallas Olímpicas y he querido que fuera realmente simple, así que he pintado un dedo en dorado, otro en plateado y el tercero en bronce, como las medallas y las he enmarcado.
I made the frame with acrylic paint in black and a stripping brush, and it was hard for me to make the lines straight and even.
What I used:
Base: China Glaze Champagne Bubbles, Astor Pop Color 145, Deliplus Magnetic nº14 and Deliplus Black
Frame: Black Acrylic Paint
TopCoat: Seche Vite
------------------------------------------------------------
He hecho el marco con pintura acrílica negra y un pincel delineador, fue complicado hacer las líneas rectas e iguales.
He utilizado:
Base: China Glaze Champagne Bubbles, Astor Pop Color 145, Deliplus Magnetico nº14 y Deliplus Negro
Marco: Pintura acrílica Negra
TopCoat: Seche Vite
This technique is called Framed Nails or Border Nails, and I've always loved it but even it looks so simple it's not simple for me to do it... I have been looking for a tutorial that makes it without brushes but I failed... So I will keep trying and If I figure out a better way to do it I will try to make a tutorial, but from now on I will have to do it with the stripping brush...
------------------------------------------------------------
Esta técnica se llama Uñas enmarcadas o Uñas delineadas, y siempre me ha gustado, pero aunque parece muy simple no lo es para mi... He estado buscando un tutorial que lo hiciera más sencillo, sin pinceles, pero no lo he conseguido... Así que lo seguiré intentando y si doy con una manera mejor para hacerlas intentaré hacer un tutorial, pero de momento tendremos que seguir con los pinceles arriba y abajo...
Even it's not perfect I loved it and I'm planning one only in black and silver because I loved how smooth look the Silver Polish. Don't you think?
------------------------------------------------------------
Aunque no está perfecta me ha encantado y ya estoy planeando una solo en negro y plata porque me ha encantado lo bonito que queda ese pintauñas. ¿No os parece?
Have a look and see what the other challengers have done!
Debbie @ The Crumpet - http://thecrumpet.blogspot.co.uk/
Neivys - http://maquiclubgirl.blogspot.com/
Helena - http://nailwish.blogspot.com.es/
Cuti-CLUE-les - http://cuti-clue-les.blogspot.com/
Katee - http://www.agirlandherpolish.com
Alyssa at Fancy Phalanges - http://fancyphalanges.blogspot.com/
Lucie @ Lucy's Stash www.lucysstash.com
Vic @ Glowstars http://glowstars.net
Rychelle @ Colorsplash Nails- http://colorsplashnails.blogspot.com/
Stella - http://mywetnails.blogspot.com
Bazzia @ http://polishmymind.blogspot.se/
Missy the Manicured Maniac @ http://melissahenderson95.blogspot.com/
Michelle @ http://lacquerorleaveher.blogspot.com/
Elizabeth @ http://nailpolishismycrack.blogspot.com/
Shayleen @ http://simplyhandyallyear.blogspot.com/
Nayade @ Toxic Vanity http://www.toxicvanity.com
Kelly (aka Nail Obsessed) @ http://crazynaillady.blogspot.com
Noniq @ Noniq Diary http://noniq.blogspot.com
Marce7ina - http://marce7ina.blogspot.com
Courtney - http://cute-iclechronicles.com
Chrisie @ http://fingersandtoads.blogspot.com
Candace @ http://lifeaskandistar.blogspot.ca/
Charis @ http://xarisc.blogspot.com/
07 mayo 2012
Chic Chevrons MSMD
Hi!
I know I said I wouldn't be doing another manicure until I start the Purple Crumpet Fairy Summer Challenge, but won't hurt anybody with my firs Monkey See Monkey Do (MSMD) manicure.
We make MSMD on Mondays and is when you copy or recreate someones manicure. So my first MSMD is inspired en the amazing talented Nailside and her Chic Chevrons. This is my attempt
------------------------------------------------------------
Hola!
Ya sé que dije que no haría ninguna manicura hasta que comenzara en Reto de Verano de Purple Crumpet Fairy, pero me parece que no le hago daño a nadie si os enseño mi primer Monkey See Monkey Do (MSMD). Hacemos MSMD los Lunes y lo que hacemos es copiar o recrear manicuras de otras bloggeras que nos gustan. Mi primer MSMD es de la increible bloggera Nailside y sus Chic Chevrons. Así es como ha salido
I know, I am really embarrased, I have been bad and have beaten my nails again, but I swear they are growing again... It was all the nervous from my graduation, that is coming really soon!!
For this manicure I've used:
Scotch Tape
Base: Justy Cosmetics Pink nº234
Chevron Tips: Deliplus Black nº58
Astor Pop Color Gold nº146
IsaDora Black Crackle nº 801
Top Coat: Seche Vite
Ya lo se, me siento fatal, me he vuelto a comer las uñas, pero prometo que ya están creciendo de nuevo... Ha sido el nerviosismo de mi graduación, que está muy cerca!!
Para esta manicura he usado:
Cinta Adhesiva
Base: Justy Cosmetics Pink nº234
Puntas en V: Deliplus Black nº58
Astor Pop Color Gold nº146
IsaDora Black Crackle nº 801
Top Coat: Seche Vite
20 febrero 2012
Late San Valentín
Bueno, más vale tarde que nunca. Aquí está la manicura que hice especialmente para el día de San Valentín. Es una excusa un poco pobre, pero no la he podido poner antes porque la cámara de fotos se perdió entre los cajones y cachivaches de mi casa, hasta hoy. Pero he estado cuidando esta manicura desde el 14 de Febrero para poder enseñárosla.
------------------------------------------------------------
Well, better late than never... Here is my Valentine's inspired manicure. I haven't posted it until now because my camera got lost inside the inmensity of the drawers of my house, until today... But I have been taking care of my nails and this manicure since 14th of February so you girls could see it.
He utilizado mis propias water decals en forma de corazón, (me encanta el dibujo con espirales) y he estampado en blanco con una de mis placas de Konad, la cual no puedo identificar ahora mismo porque todos mis materiales los tiene una compañera que me los ha pedido prestados para este fin de semana.
Gracias por Leer!!
------------------------------------------------------------
I've used my selfmade water decals with the heart shape (I love the swirly pattern) and I stamped with white a design from one of my konad plates, but from now I can't say which one is because I borrowed all my manicure staff to one of my friends, only during weekend, so I can tell you tomorrow.
See You Soon!!
09 junio 2011
Manicura Degradada Veraniega
Hoy tenemos un post rápido. Os traigo una manicura inspirada en colores del verano. Está hecha con tres colores, amarillo, naranja y rojo como base, con un degradado con la técnica de la esponja. Después tenemos un estampado con la placa m57 de Konad, con el diseño de zebra en blanco.
Espero que os guste.
Estos son los materiales con los que está hecha la manicura
Y esta es la plakita
Nos vemos pronto!!!
TeddyCat
31 mayo 2011
Garden Konad Manicure
Since I have started to read beauty blogs I've heard more and more about Konad Nail Stamping. This has been a great discover for me! Another post will be made about Konad, even if all of you already know what it is I think there are no bad things on having information, and if some of you are as absentminded as me this will be useful for you!
Desde que he comenzado a leer blogs de cosméticos y belleza he estado oyendo más y más sobre los Estampados de Uñas de Konad. Ha sido un gran descubrimiento para mi! Haré otro post sobre Konad, incluso si muchos ya sabeis lo que es creo que no hay nada malo en tener información, y si algunos sois tan despistados como yo, os resultará útil!
Image: http://nailpolishnews.com
Recently I have bought a basic Konad Kit and two more image plates and this days monhs that I haven't updated I have been practising with them a lot. Now I'm going to show you the manicure that I have right now. It's not perfect but I think It's pretty and reminds me of a garden, with a white fence. :)
Hace poco me compré un kit básico de Konad y dos placas más, y estos dias meses que no he actualizado he estado practicando mucho. Ahora os voy a enseñar la manicura que llevo ahora mismo. No está perfecta, pero creo que es bonita, me recuerda a un jardín, con una valla blanca. :)
As you can see is not a french manicure, the lines are diagonal because my nails are uneven, the exam's weeks make me nervous and It makes me bite my nails again... However It's amazing what you can do with the nail stamping! The designs I used for this manicure were:
Como podeis ver no es una manicura francesa, las líneas están en diagonal porque tengo las uñas desiguales. La época de examenes me pone nerviosa y hace que me estropee las uñas otra vez. Sin embargo es increible lo que se puede hacer con el estampado! Los diseños que usé para la manicura son:
Plates m36 and m57
Son las placas m36 y m57
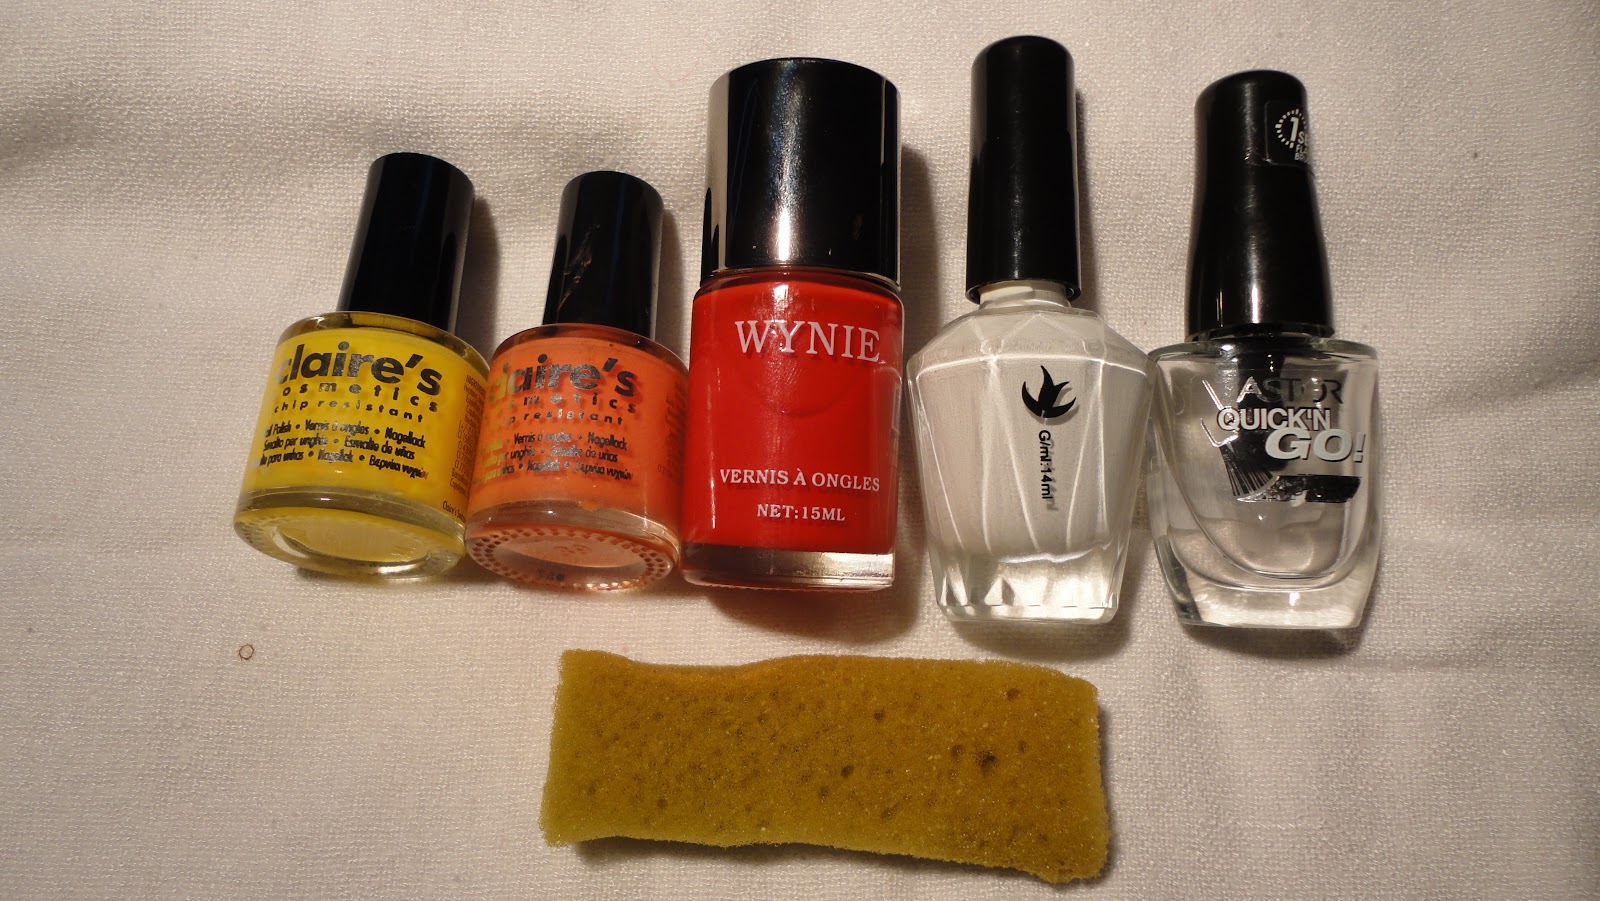
The polishes I used were:
- Claire's Cosmetics nº137 Green Jade
- Konad Nail Polish nº52 White
- Deliplus Nail Polish nº58 Black
- Top Coat Astor Quick'n GO! nº1
I don't have made a picture of the white polish because it was inside the box. Well I hope you like it! If you have any questions leave a comment. Maby next manicure may come with tutorial, I don't know, It's a lot of work and I'm not really sure if people it's going to read it. If you want tutorials just... comment!! :))
No he hecho fotos de la pintura blanca porque estaba metida en la caja. Bueno, espero que os guste! Si teneis alguna duda dejad un comentario. Tal vez la próxima manicura venga con un tutorial, no lo sé, es mucho trabajo y no estoy muy segura de si la gente lo va a leer. Si quereis tutoriales solo... comentad!! :))
❤TeddyCat❤
Suscribirse a:
Entradas (Atom)